1. Introduction
2. Collection of blood samples
3. Storage of serum samples
4. Shipment of the samples
5. Measuring the samples
6. Cost of the material which can be provided by the lab
7. Checklist
1. Introduction:
For the detection
of Vitamin A and iron deficiency it is possible to measure certain proteins
in blood (RBP for Vitamin A deficiency, Ferritin and sTfR for iron deficiency)
with a sensitive and inexpensive Sandwich ELISA technique (Erhardt JG et. al.
2004). It can also be easily combined with the
measurement of CRP and AGP as indicators for acute and chronic
infection. The infectious status can be of interest by itself
but also be used to correct RBP and ferritin which are influenced by infection (click on Ferritin or Vit. A to
get the publications for this procedure). The combined Sandwich ELISA technique needs some experience and there are problems with the
availability of the antibodies but the advantage is that the 5 proteins can be measured for 5
USD/sample (in average 1 USD per protein) with a high throughput
procedure in bigger sample sizes (up to 2500/project). As material
serum from venous or capillary sampling can be used and already 25
ul are sufficient to do
a double measurement of these 5 proteins. Therefore a finger or
heel prick is usually
sufficient to get enough blood for doing these measurements. The best material
for the measurement of the proteins is serum. Heparin plasma
usually forms cryoprecipitates after a freeze/thaw cycle which can
block the tips of the pipettor and EDTA plasma can have problems
with the stability of sTfR after freeze/thaw cycles.
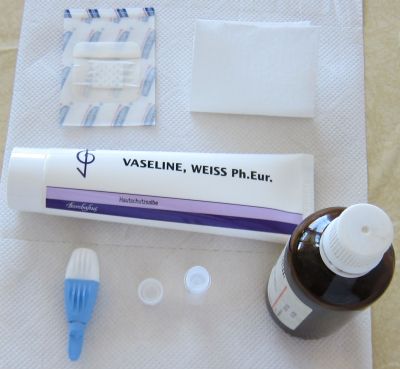
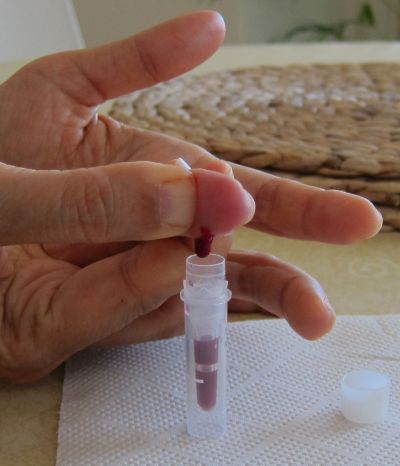
2. Collection of blood samples:
The
pictures above shows an example on how capillary blood
samples from the finger can be collected into a serum tube. The finger
is first
disinfected with alcohol, optionally a thin layer of vaseline or
silicon
spray added and then the finger punctured. After that the
blood usually
just drops into the serum tube (e.g. the one from Sarstedt which is
shown here, ord. no. 20.1308) when the finger is a bit pressed as in
this example (not
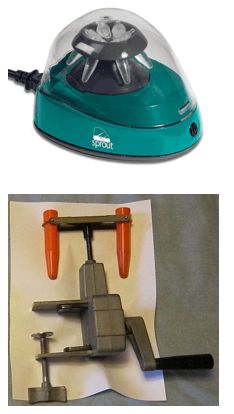
milked). After some time in upright position (20-60 min) the tube
can then be
centrifuged in a mini centrifuge or a manual centrifuge (more expensive and not so convenient). To
increase the blood volume warming the hand, using
high efficient
lancets (e.g. the blue ones from Becton Dickinson, ord. no. 366594 ),
wiping off the blood with a tissue to initiate again the blood
flow or adding vaseline/silicon spray to inhibit the coagulation of blood in the puncture
hole can be
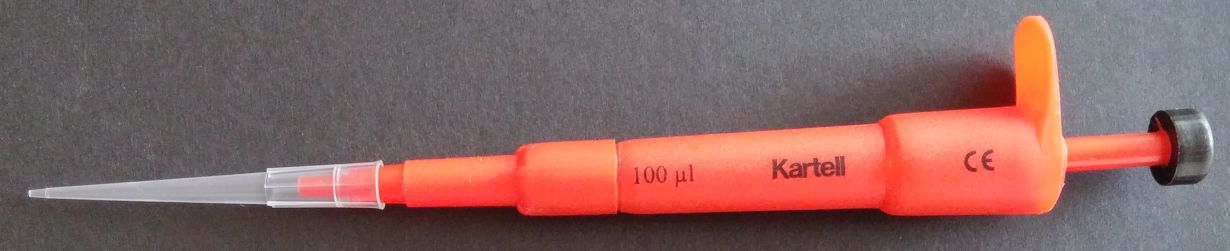
helpful procedures. Getting 100 ul serum is usually no
problem and can be easily pipetted with an inexpensive 100 ul pipette (around 25USD). Alternatively 50 ul serum and a 50 ul pipette would also be OK.
3. Storage of serum samples
After
centrifugation the serum should be stored in 0.2
mL PCR tubes from Sarstedt (ord. no.
72.737.002). They are more robust than other PCR tubes and can be directly used in an automatic
pipetting system to avoid the tedious and error prone manual pipetting.
If an immediate frozen storage is not possible
storage in non frozen form for some days is possible. Extensive
tests at the CDC in Atlanta have shown
that proteins in serum are stable at room temperature for one week.
Since the conditions in the field can
be much worse (temperature > 25°C or higher risk for
bacterial growth) it's better to freeze
the serum as soon as possible or at least to keep it in a
cool environment. A car battery driven refrigerator or some deep frozen
water bottles in the bottom of a good styrofoam box can be
helfpul for this.
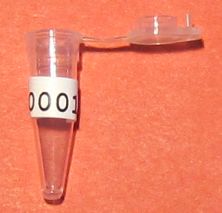
The
picture above shows on how special labels from Brady
(LAT-29-799) have to be attached on the dry and clean surface of
the tube. These labels are
made of Nylon and therefore more sticky than other labels. Since
it needs some
experience to print the ID's correctly with a Laser Printer (tubes with
handwritten labels are difficult to handle) they
have to be provided by the lab can be send to any place in the
world in a Fedex letter. For this only a list of the ID's in Excel
or a system (e.g.
#0001 to #2000) is necessary. The limiting is that not more
than 6 digits fit on one label and the easier the ID's are the less
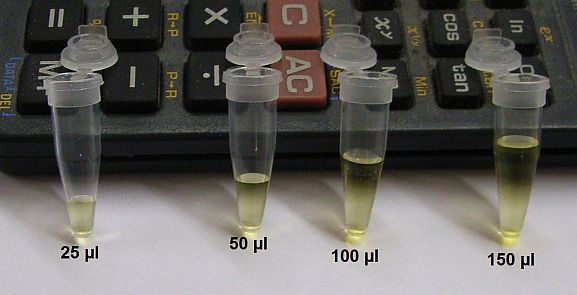
work it is to enter them into Excel. The second picture shows examples on the volumes in the 0.2 mL PCR tubes. To prevent
spilling over and to reduce carry over effects the volume should never be more than 150 ul.
The samples can be stored frozen in a
Ziploc bag but sometimes it's useful to put them into efficient storage boxes (see picture below with a 16*16
grid) to prevent that labels get lost.
4. Shipment of the samples:
The following pictures show examples of shipment boxes for transporting blood samples below 0°C.
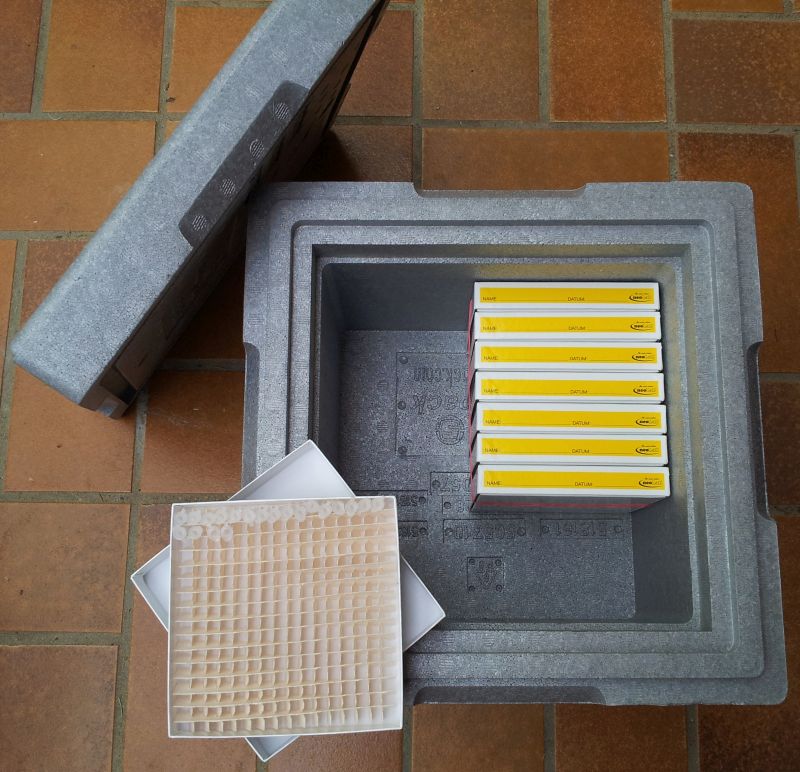
This one is
a Neopor box with more than 5 cm thick
walls, better insulation properties than styrofoam, tightly closing lid
and sample boxes for more than 2000 samples (the grid in the sample
box is 16*16). There is still space for adding dry ice which is sufficient to keep
the samples frozen for up to 7 days. A
small amount of dry ice (< 3 kg) is
always allowed without declaration and since every passenger of an
airplane transports around 5 L of blood, the shipment of tiny amounts
of blood in stable tubes in a good styrofoam box is no risk
at all. If
the empty space is fully filled with dry ice it's useful to make
a small hole with a needle to prevent any build up of pressure
inside the box.
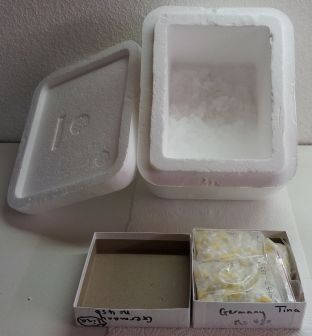
This box is a less good small
styrofoam box after a two day transcontinental transport. It fits easily into a normal suitcase and is therefore also
suitable for
a personal transport. The tubes are
well protected by the Ziploc bags and immobilized in the card box
to prevent that labels get loose (aluminium foil
around the Ziploc bag can replace the card box). From
the
orignal 3 kg dry ice there was still enough leftover for a third
day.
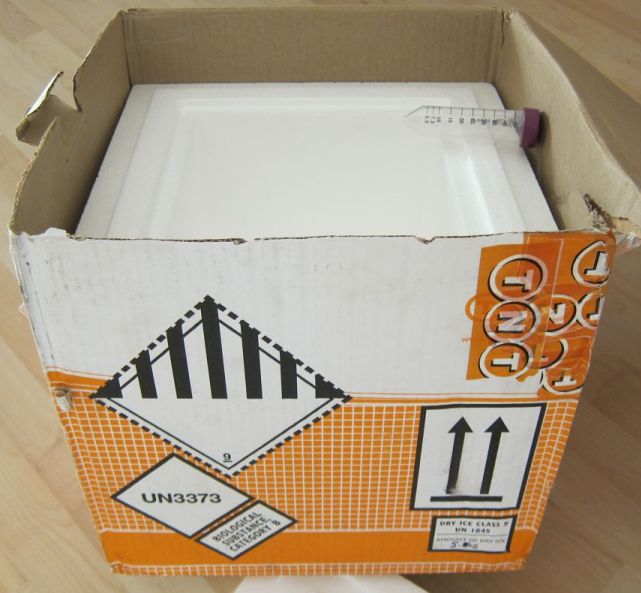
This box shows one which was provided by TNT for a shipment
from Nairobi to Germany and included the dry ice and all necessary
labelling (UN3373 for biological samples, UN1845 for dry ice). The
walls are even thicker than 5 cm and from the 5 kg dry ice which were added
in Nairobi there was still plenty of dry ice in the box after a 4 day
transport. The cost of this shipment (box, dry ice and door to door transport) was around 500 USD.
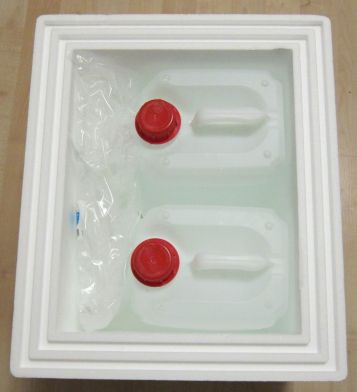
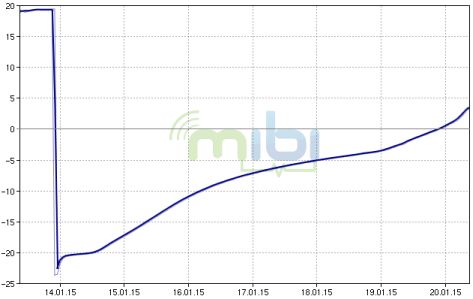
This picture and diagram shows on how it is possible to transport
samples (here 2000 tubes in Ziploc bags) frozen without dry ice.
It needs a good styrofoam box in which two 5L container with salt water
fits (both can be provided by the lab). The salt in the water (500g per 5L) keeps
the temperature in the box longer below -5° (without the
salt the temperature would already be after one day at 0°). In
this
forrm the samples can be kept frozen for almost 6 days which is
more than
enough for a shipment with a standard courier. Since the 5 proteins are quite robust it's even no problem when the samples would thaw for a not too long time.
Because
of these transport options there is usually no need to use an
expensive
special courier which can cost up to 7000USD to ship samples on dry ice
from Africa to Germany. These special shipments take usually also
longer than shipments with standard couriers like DHL or Fedex (see examples behind the
links). The problem is often that shipments of blood are made
unnecessarily dangerous and complicated which increases the effort, the expenses and
the time of the shipment.
For
importing samples into Germany only this letter has
to accompany the box (an updated version of it).
As long as there are no animal samples in the box and the EORI
number included in the address there is usually no problem with the German custom. When a
labelling for the content is necessary the important is to use
only the UN3373 declaration which is for non dangerous blood samples
(comparable with the blood from passengers of a flight). If this letter is attached to the outside of the box the declaration of the shipment is fully correct.
In case that
a personal transport is possible a
handover of the samples at one of the airports around Southwest
Germany
(Frankfurt, Zurich, Paris) can usually be arranged. This is the
fastest
and least problematic for shipment requirements. When
the only option is a very expensive courier (e.g. > 4000USD) it
might also be possible to arrange a much less costly pick up of the
samples
on dry ice by the lab which is also helpful for negotiation when the cost of a shipment is only high because there is no competition. A personal transport
has at least the same safety since all of the
transport work can be done by a reliable person (the Federal
Aviation Administration of the USA allows for this 2.5 kg dry ice in
the baggage which is sufficient for a 24 hour transport). A
cargo transport with a special courier like World Courier involves
usually several flights and car transports done
by different
workers where it is always possible that parcels get lost, damaged
or stolen.
5. Measuring the samples:

This is an
automatic pipettor with the 0.2 mL
tubes from Sarstedt in a special rack which can be used to replace the
tedious and
error prone manual pipetting. Therefore samples which don't fit into this rack (using other sample tubes,
inappropriate labels,..) can't be measured.
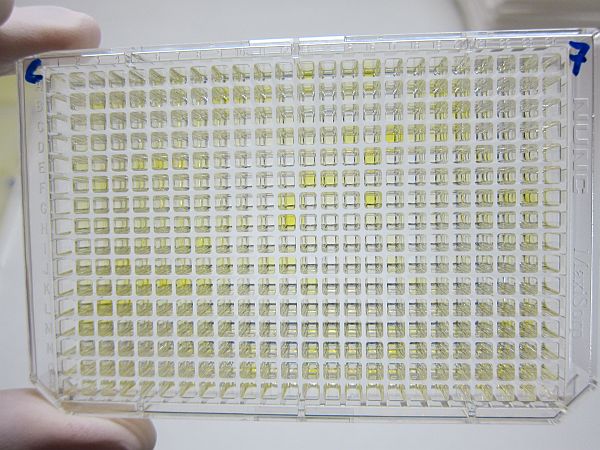
This shows the final result of the ELISA on a 384 well plate (in this
picture CRP). The values can then be
presented in the following form for the samples and the calibration/quality control.
6. Cost of the material which can be provided by the lab:
The
following is a list of the cost for the material which can be
provided by the lab and send to almost any place in the
world:
For a survey with 2000 samples it would be:
2000 Labels: 50 USD
2000 Sarstedt 0.2 mL tubes: 100 USD
1 Neopor box: 15 USD (alternatively 1 Styrofoam box with two 5 L containers for frozen salt water)
8 sample boxes (optional): 70 USD
Shipment cost with standard postal service: 50 USD
The expenses are relatively small in comparison to the
analysis cost and can therefore easily be paid from the lab
budget. The much
worse
would be working with inappropriate material. If anything should be
missing or if there is any additional question please send an e-mail to
erhardtj@gmail.com. Usually a reply should come in less than 2
days. Otherwise just send a reminder.
VitMin Lab
Dr. Juergen Erhardt
Kastanienweg 5
77731 Willstaett
Germany
Tel.: +49-7852-933070
Fax: +49-7852-933071
7. Checklist for the most essential:
-50ul up to 100ul serum (not more volume and no plasma, 50 ul pipette would be useful for pipetting)
-in 0.2 mL tubes from Sarstedt (no. 72.737.002)
-with Laser printed labels from Brady
-in high efficient storage boxes with max 2.5 cm height and a 16x16 or 14x14 grid